

I know I said I'd only post after graduation but.... This is too good not to share. This post is for any one who lives near a Daiso and wants to depot their make up. Total cost of this particular DIY Magnetic Palette: SGD$4 !!!!! Or $2 if you already own magnetic sheets or your makeup comes in aluminium (is that the magnetic metal?) tins.
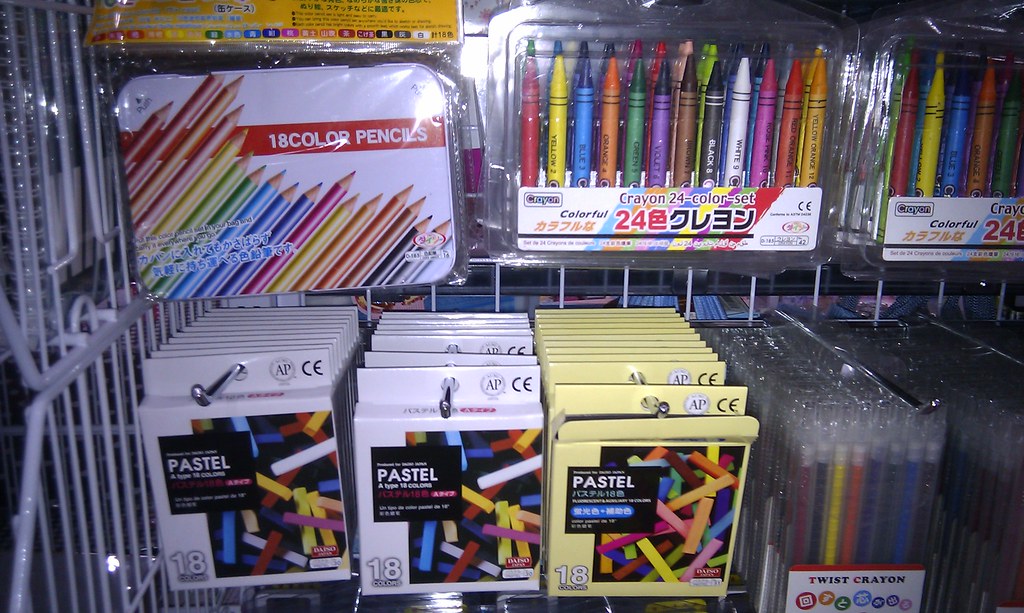 |
| credits to: http://www.flickr.com/photos/avlxyz/8069388206/sizes/l |
Tools required: (everything in here can be found at Daiso, so go wild)
1. The magical 18 Color Pencil set (top left hand corner of picture). This case measures 15.5cm x 11.5cm x 1.3cm, the slimmest, most hardy case I could find in all of Daiso. Why is this case magic you ask? The magic lies in that this case is.... *drumroll* ... already magnetic! So you don't need to fiddle with cutting any large magnetic sheets to fit into your palette! I only realized this after i completed my palettes - silly me.
2. Magnetic tape/sheet (make sure sheet is sticky on one side) to stick onto the depotted make up.
3. Scissors/Penknife (to cut your magnetic tape/sheet)
4. Nail Polish and Cosmetic Wedges or Washi Tape for decoration.
5. Extra: If you're looking for smaller palettes with mirror, the business card holder section of Daiso should offer a decent selection. They're mostly made of plastic though, which would mean you would need to fit a magnetic sheet to the bottom of the case.
_________________________________________
Process:
Essentially, the only question here is whether you want to decorate your DIY palette or not. If you're not fussed on whether the palette looks good... then just begin depotting to your heart's content.
I chose nail polish over washi tape because washi tape is made of paper and is hard to clean. I did however, get slightly lazy and taped the depth of my tin with 0.5cm thick washi tape just to seal off the edges nicely.
Paint 3 coats of nail polish (or until opaque) over the entire cover of the tin to cover the print. The bottom half of the tin is entirely silver so you can leave that alone. It is advisable to do this in a well ventilated area because I believe you should not be inhaling too much nail polish fumes. When the 3 coats are fully dry, grab a cosmetic wedge and rip it into 2, pour another colour of nail polish onto a piece of foil, dab the ragged edge of the sponge into the nail polish and begin dabbing onto the tin. Repeat process with as many colours as you want!
P.S. mix and match different polish finishes for great effects! also, just a heads up, a poor quality cosmetic sponge will flake off when you dab the tin, but no worries, that just adds to the texture of the surface!
Now you can begin depotting and attaching the magnetic tape to the bottoms of the tins that aren't already magnetic, then just pop them into your beautiful new palette. Magic!
_________________________________________
Hope someone enjoys this barely a tutorial of a tutorial and saves some moolah because we all know that could be better spent on ... more cosmetics!
Woah, this is genius! Thanks for the info; I'd never have known the casing was magnetic! XD
ReplyDelete